 Previous Page Next Page
Creating Web Reports Using Wizard
When Web Report Studio is in the traditional way, you can create web reports using the wizard.
- Choose an entry to open the Web Report Wizard:
- On the JReport Server Start Page, click Web Reports in the Create category. Next specify a folder and a catalog in the folder.
- On the JReport Console > Resources page, browse to a folder that contains catalogs, select the catalog for the new web report from the Catalog drop-down list, and then click New > Web Report on the task bar.
- In Web Report Studio, click File > New Report or the New Report button
 on the toolbar.
The Web Report Wizard appears.
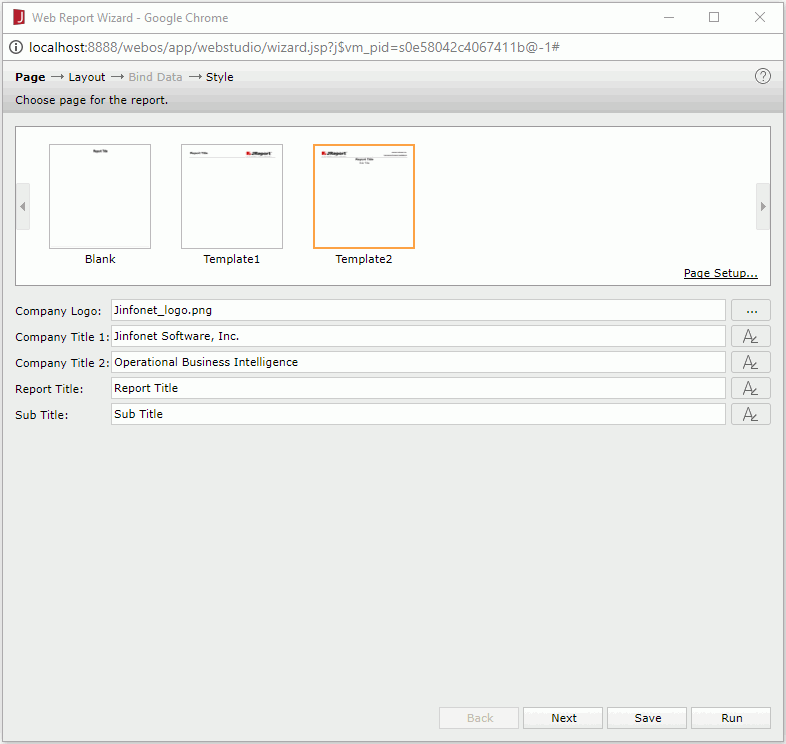
- In the Page screen, choose a template for the report. The built-in templates contain information about Jinfonet. You can customize them to meet your own requirement. Use
 to load your company logo. Edit the text and set the font properties for company titles and report titles using
  . Click the Page Setup link to set the page properties. If you are an administrator with the privilege of publishing resources, you can also create a new template to save your customization.
- In the Layout screen, select the required layout with which you want to create the report. Then, in the edit layout area, select a tabular cell and select the component you want to display in the cell. Click the Align drop-down list to set the component to the left, center or right of the cell. Repeat this to add component to the other cells.
If required, you can split the selected cell horizontally or vertically by clicking the Horizontal Split or Vertical Split button, merge adjacent cells by selecting them and clicking Merge. You can also resize the tabular cells by dragging the cell border.

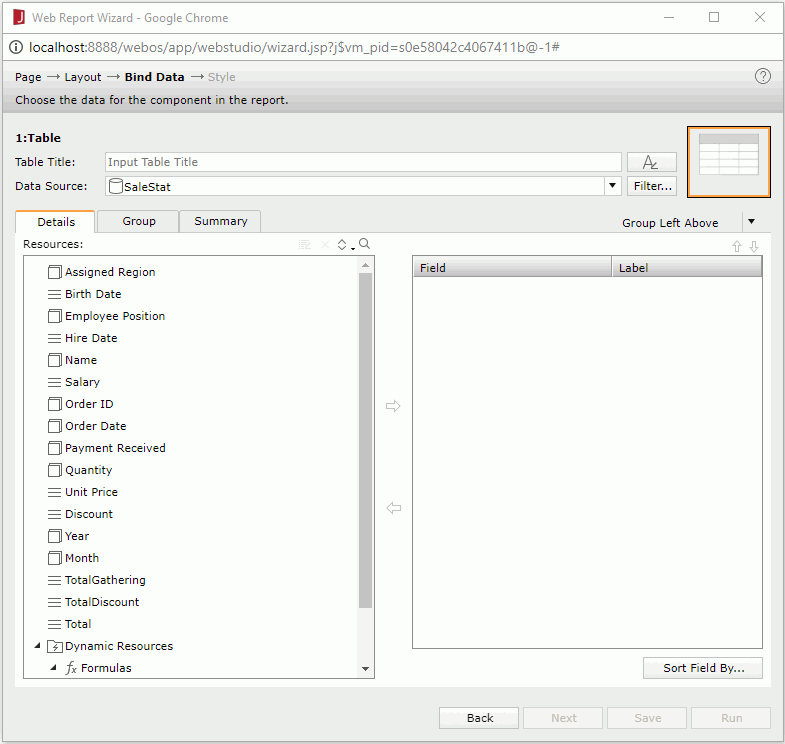
- In the Bind Data screen, define the specified components (for details about how to define a component, refer to the specific topic in Inserting Components).
You can use the Back and Next buttons to switch between the components.
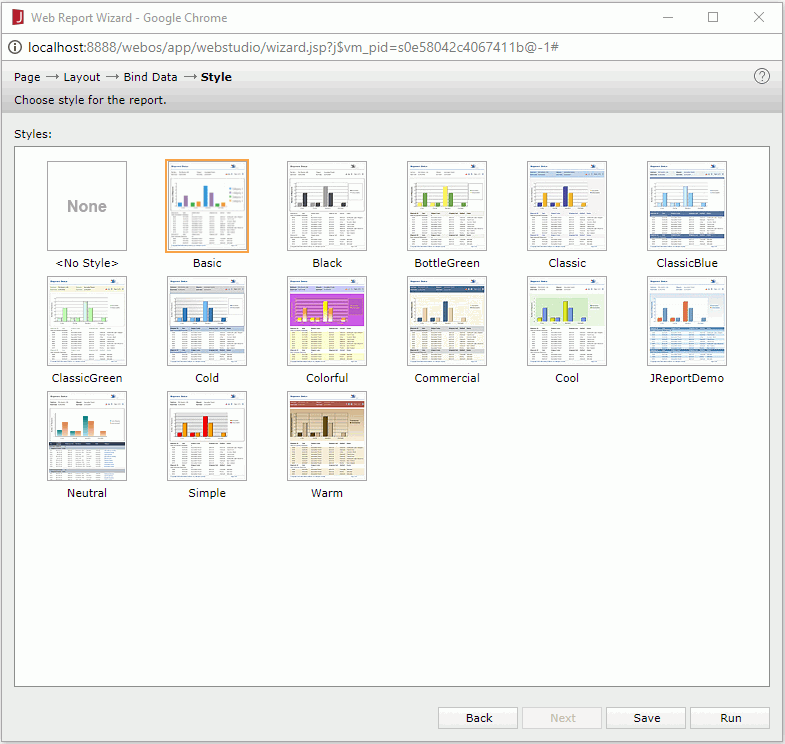
- In the Style screen, apply a style to the report.
- Click Save to save the report to the server resource tree. For details, see Saving the Report.
- Click Run. If any parameter is used in the report, the Report Parameters dialog appears for you to specify the parameter value, then the report is opened in Web Report Studio.
You can also use URL command to directly open the Web Report Wizard to create a web report via standard wizard way.
Web report templates
When creating web reports using the Web Report Wizard, you need to choose a starting template. A web report template stores information on the header and footer as a starting point for a web report. If you are an administrator with the privilege of publishing resources, you can save report templates to include standard features such as a company logo, company name, privacy notices or any standard items and styles you want your users to start with.
The saved report templates will be added into <install_root>\templates of JReport Server, and will be automatically loaded onto the Page screen of the Web Report Wizard for use.
Creating web report templates
To create a report template by customizing the built-in templates in the Web Report Wizard:
The Web Report Wizard provides sample templates for you to define your own templates based on.
- In the Page screen of the Web Report Wizard, make use of Template1 or Template2 to customize your own report templates. With Template1, you can add your company logo and report title. With Template2, you can add more items such as company name and title and report sub title. Use to load your company logo. You can set the font properties for company titles and report titles using .
- Click the Save button.
- In the Save As dialog, choose the file type of Web Report Template (*.wsld), specify a name for the template in the File Name text field, then click Save to save the template.
To create a report template by editing a report in Web Report Studio:
- Open a report in Web Report Studio.
- Edit the header and footer of the report.
The report header and footer are composed by two tabulars. You can split or merge the tabular cells by clicking the button  or
or  on the toolbar, then add objects from the Components panel into the tabular cells and format them to customize the header and footer.
- Click Menu > File > Save As or the Save As button
 on the toolbar.
- In the Save As dialog, choose the file type Web Report Template (*.wsld), specify a name for the template in the File Name text field, then click Save to save the template.
Dynamically displaying the company logo
If the web report template used for creating a report contains company logo, you can make the logo display dynamically.
- Select the company logo image in the report and then do either of the following:
- Right-click the image and select Properties from the shortcut menu to display the Image Properties dialog, then click
 next to the Image Name option.
- Click Menu > View > Inspector to display the Inspector panel, then in the Properties sheet click in the value cell of the Image Name property.
- Do either of the following to change the image name.
- Select a formula that returns an image source from the drop-down list. By default, there will be no formula available in the list. If you want to use a formula to control the image source, you need to first bind a data source to the web report, then create formulas that return image sources in the Resources panel. For details, refer to Using formulas to control showing or hiding components.
- Select <Edit Expression> from the drop-down list to open the Formula Editor and edit an expression to control the image source.
JReport provides a built-in parameter named JRS_P_LOGOURL, which enables you to specify the image path easily. You can enter return @JRS_P_LOGOURL; directly in the editing box of the Formula Editor to create the expression.
- If you are in the Image Properties dialog, click OK to accept the change.
If the specified formula or expression returns an image, the image is changed. If the specified formula or expression uses parameters, the parameters are added to the Parameters panel. You can specify the parameter values in the panel to dynamically change the image.
If you are an administrator with the privilege of publishing resources, you can then click Menu > File > Save As or the Save As button on the toolbar to save the template as a new one for future use. However, if the company logo of a template is controlled by a formula, later when users use this template to create web reports, the web reports might not be created successfully, so JReport provides an option in the Web Report Studio profile for you to determine what you want JReport to do in this case.
Renaming/Removing a web report template
To rename or remove a web report template, go to <install_root>\templates on your server, then rename or delete the template file (.wsld). For each template file, there is an image file (.wsld.png) which is used to display in the templates box of the Page screen of the Web Report Wizard, as a representative of the template. You need to rename or delete the image file at the same time when you rename or delete the template file.
Previous Page Next Page