 Previous Page Next Page
Example 2: Publishing a Report to Disk
In this example, you will learn how to set up a task to publish the report result in various file formats to the file system repeatedly at the start of each month.
It is not available to organization users.
- On the JReport Console > Resources page, select the report row, right-click in the row and select Schedule from the shortcut menu to display the Schedule dialog.
- In the General tab, specify the general report settings.
- In the Parameter tab, specify the parameter values as required if the report has parameters.
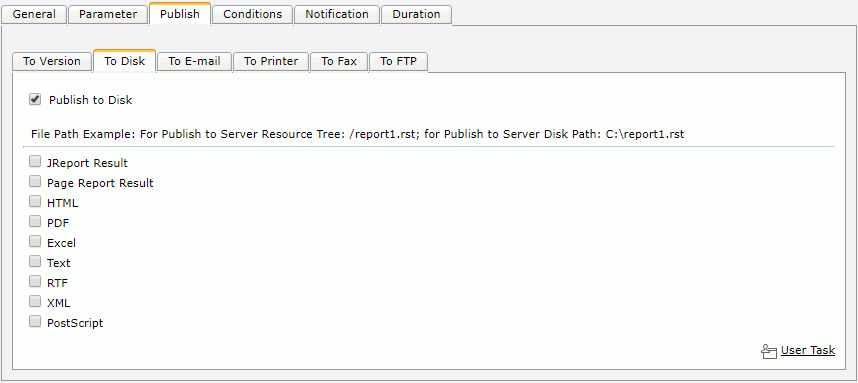
- In the Publish tab, click the To Disk sub tab, check Publish to Disk, then select the required formats, specify the result locations, and set the format settings according to your requirements. You can apply dynamic names for the result if necessary.
- In the Conditions tab,
- In the Time sub tab, define the time zone from the Time Zone drop-down list, then from the Time Type drop-down list, choose Run this task periodically.
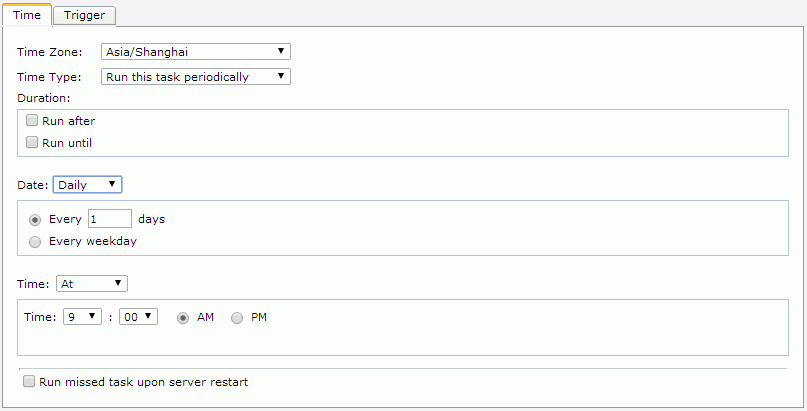
- In the Duration box, specify a time period for when the task will be performed.
- Select Monthly from the Date drop-down list and keep the default to run the first day of every 1 month.
- Keep the Time settings as default.
- If you want to notify someone of when the task is finished by sending an e-mail, go to the Notification tab and set the settings.
- Click Finish to have the task performed.
Then, click My Tasks on the system toolbar, you will see that the scheduled task has been recorded in the Scheduled table. Since you have not specified the duration Run until a time for this task, it will not stop being performed until you delete or disable it from the Scheduled table.
Notes:
- When scheduling to publish a page report to disk, the Page Report Result and JReport Result formats are based on the report level, that is, the report with all selected report tabs will be output to a single file no matter Export to One File in the General tab is checked or not.
- When you specify to publish the report result to the server resource tree, if the specified folder has a real path, the result will be put to the real path. Otherwise it will be put to the default disk location where server resources are.
- If you specify to publish the report result to a non-existent folder on disk, JReport Server will automatically create it.
Previous Page Next Page