Previous Page Next Page
You can manipulate data components, which refer to crosstabs, tables, banded objects, charts and geographic maps, in Page Report Studio. However for the data components created in JReport Designer, to perform some of the manipulation actions requires that the data fields used by the components can be converted to corresponding view elements. The actions include:
Tip: To display the Resource View panel, click Menu > View > Resource View or the Resource View button  on the toolbar. You can use the search bar at the top of the panel to search for any desired resource in a fast and convenient way.
In addition, a JReport Live license for JReport Server is required in order to use the features involving business view or changes of report template. If you do not have the license, contact your Jinfonet Software account manager to obtain it.
The following shows manipulating on specific data components in detail. Most of the manipulations require selecting the component first. To select a component, click anywhere in the component, when the icon  appears at its upper left corner, click the icon.
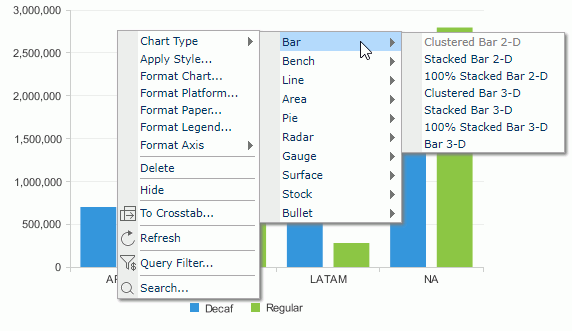
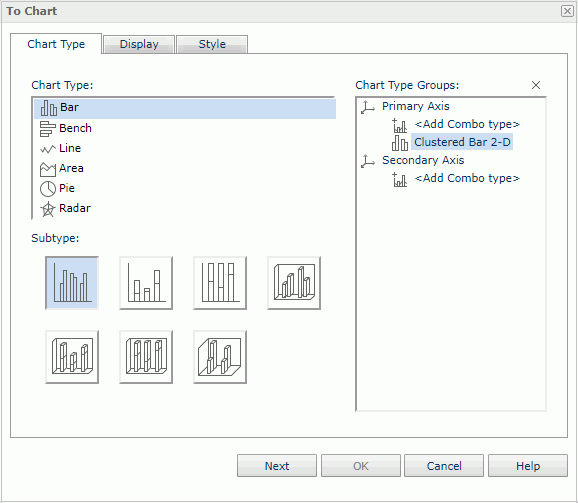
 on the toolbar, and then select a suitable subtype from the drop-down menu.
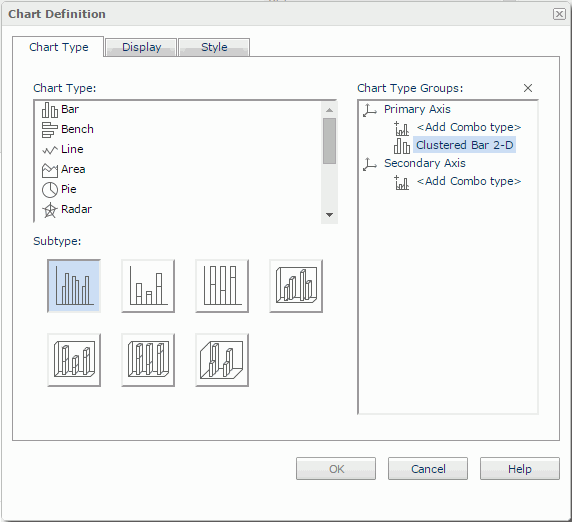
For details about how to define a chart, see Creating a Chart Report.
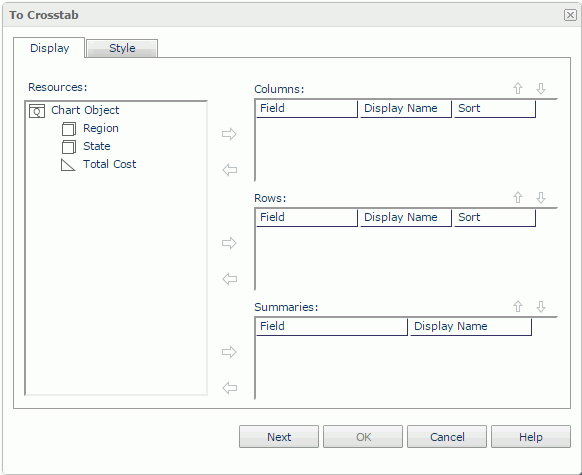
or any part of the chart except for the legend and label, then click To Crosstab on the shortcut menu.The To Crosstab dialog appears.
 in the Resources box and click
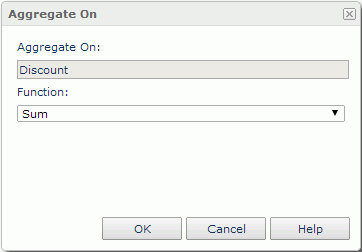
  to add it as a group field to the Columns or Rows box; add the aggregation objects
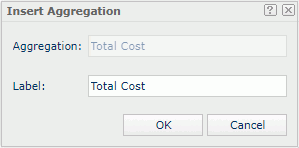
  to the Summaries box to summarize data in the crosstab. In the Display Name column, you can edit the display names of the added group and aggregation objects to label the columns, rows and summaries in the generated crosstab. In the Sort column, specify a sort manner on a group object. To adjust the display order of the aggregation objects, select one in the Summaries box and click
  or
or  .
.
If the chart is in a table or banded object, by default, the crosstab converted from the chart will take on the style of the table or banded object. If you want to apply another style to the crosstab, uncheck the Inherit Style option and choose the desired style in the Style box. However, when there is only one style available, this style will be applied to the crosstab by default and the Style tab will be hidden from the dialog.
Note: If the chart is created on a business view in Page Report Studio, it can contain additional values which are supported only in chart. Therefore when you convert a chart with additional values into crosstab, the additional values are not converted together with the chart.
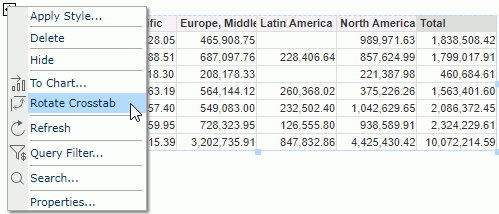
To rotate a crosstab, first select it, and then do one of the following:
 on the toolbar. of the crosstab and select Rotate Crosstab from the shortcut menu.
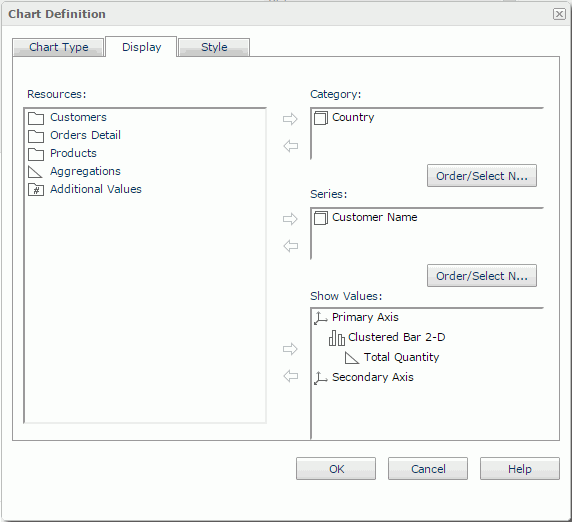
and select To Chart from the shortcut menu.The To Chart dialog appears.
from the Resources box to the Category box, and so to the Series box, and aggregation objects to the Show Values box respectively.
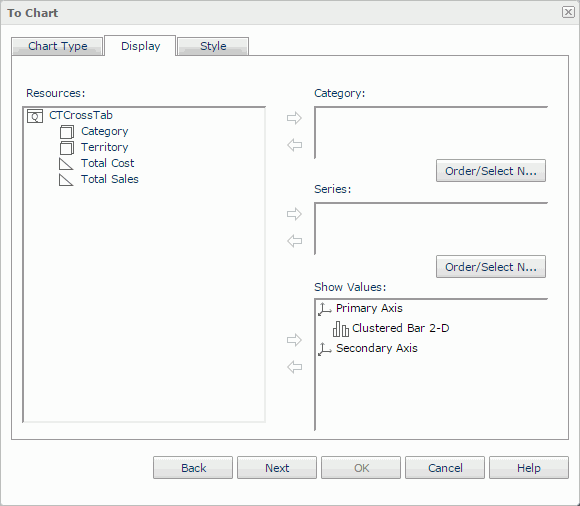
If the crosstab is in a banded object, by default, the chart converted from the crosstab will take on the style of the banded object. If you want to apply another style to the chart, uncheck the Inherit Style option and choose the desired style in the Style box. However, when there is only one style available, this style will be applied to the chart by default and the Style tab will be hidden from the dialog.

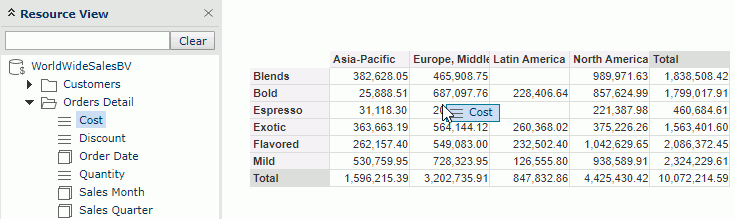
From the Resource View panel, you can drag view elements and dynamic resources into a crosstab to add new column/row headers and aggregations in the crosstab. To do this, first select the crosstab to locate the business view it uses in the Resource View panel, then:
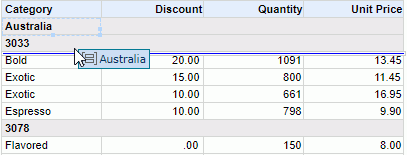
or dynamic formula used as Group from the Resource View panel and move the mouse pointer above or below an existing column header until a highlighted horizontal line appears, then release the mouse.
or dynamic formula used as Group from the Resource View panel and move the mouse pointer to the left or right of an existing row header until a highlighted vertical line appears, then release the mouse.
 , aggregation object , or dynamic formula/aggregation from the Resource View panel and move the mouse pointer above or under the desired subtotal, total or grand total cell, then release the mouse.
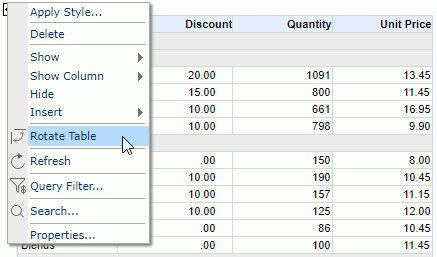
on the toolbar. of the table and select Rotate Table from the shortcut menu.
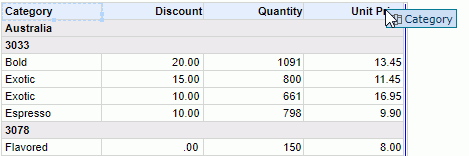
of the table, then on the shortcut menu, check the names of the columns you want to show from the Show Column submenu.For groups displayed vertically in group columns, you can specify to place them horizontally in the table. To do this, right-click a blank cell or a value in the group column and select Horizontal to Detail from the shortcut menu.
of the table, then click Insert > Common Column on the shortcut menu. of the table, then select Insert > Detail Column/Summary Column from the shortcut menu.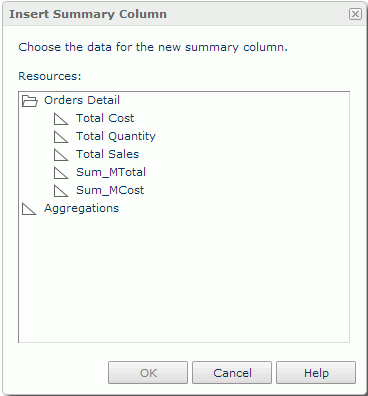
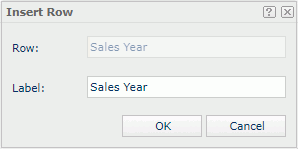
of the table, then select Insert > Group Column from the shortcut menu. The Insert Group Column dialog appears, with the existing groups the table contains listed in an indented structure in the right box. You can edit the groups if you want.

to add it to the right box as the group-by field, then specify the sort direction of the group in the Sort column. and buttons to adjust the group levels.Note: If you right-click any column header and use its shortcut menu to insert a common, detail or summary column, the Insert Column dialog will appear for you to specify the position of the column to be inserted, which can be before or after the selected column, however, if you use the table shortcut menu to insert the column,
When you finish summarizing a detail column, you will find a dynamic aggregation object is created at the same time which is given a default name Function_DetailFieldName in the Dynamic Resources > Aggregations list of the Resource View panel and you can use it again in the current report if required.
When a table contains several group rows, you can adjust the order of the group rows to edit the group levels. To do this, drag a value in a group row above or below another group row until a horizontally highlighted line appears, then release the mouse.
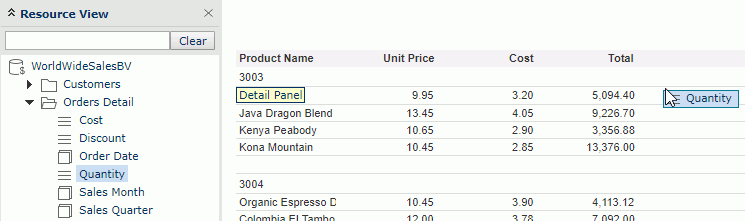
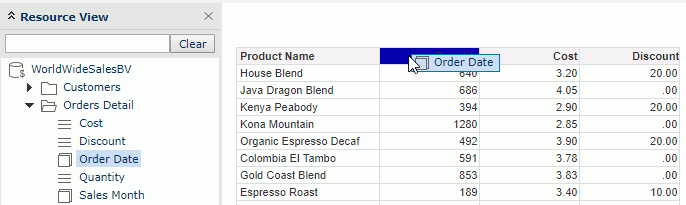
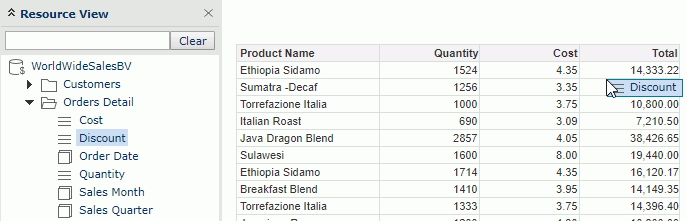
From the Resource View panel, you can drag view elements and dynamic resources into a table to replace the existing fields or add new columns/rows in the table. To do this, first select the table to locate the business view it uses in the Resource View panel, then:
Values of the selected object are then added in the column together with the existing values.
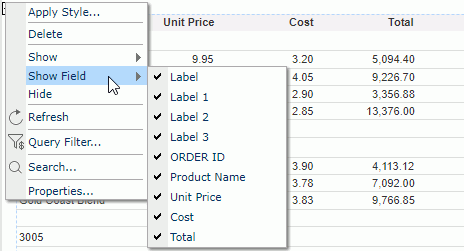
of the banded object, then on the shortcut menu, click the DBFields and labels you want to show from the Show Field submenu. For a DBField or label that is shown, it will be marked with a check mark, and vise verse. You can also hide a DBField or label by right-clicking it and selecting Hide from the shortcut menu.
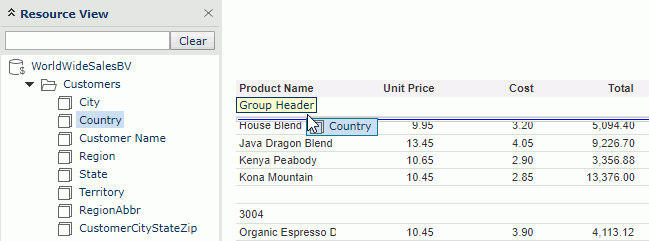
of the banded object, then on the shortcut menu, click the item which indicates the panel name from the Show submenu. For a panel which is shown, the item is with a check mark, and vice versa. You can also hide a panel by right-clicking it and selecting Hide from the shortcut menu.From the Resource View panel, you can drag view elements and dynamic resources into a banded object to add new groups and detail fields in the banded object. To do this, first select the banded object to locate the business view it uses in the Resource View panel, then:
or dynamic formula used as Group from the Resource View panel and move the mouse pointer above or below any existing group until a highlighted horizontal line appears and the tip Group Header shows up (if there is no existing group in the banded object, move to the bottom boundary of the column header until the tip Banded Page Header and a highlighted horizontal line show up), then release the mouse.