 Previous Page Next Page
You have two ways to create joins between tables in a query, automatically or manually. Any joins defined between two tables are represented as arrows connecting the key fields from the two tables. Besides joining tables in the same data source connection, JReport also allows you to join tables that come from different connections to create distributed joins.
The Auto Join feature enables you to join tables together automatically based upon the following criteria. However if you have specified to use pre-joins in your queries, the Auto Join feature will not take effect.
By default all the three auto join criteria are turned on. If you do not want to apply any criteria in a query, in the Query Editor open Menu > Query > Auto Join and uncheck the criteria you want to turn off. To turn off the criteria for all queries, go to File > Options > Query Editor and uncheck the criteria you want to turn off in the Options dialog.
To create manual joins, use one of the following two ways:
The join relationship is then established between the tables. When more than one relationship is required between two tables, you can create multiple joins between them.
No matter whether a join is created automatically or manually, you can further edit it if required. To do this:
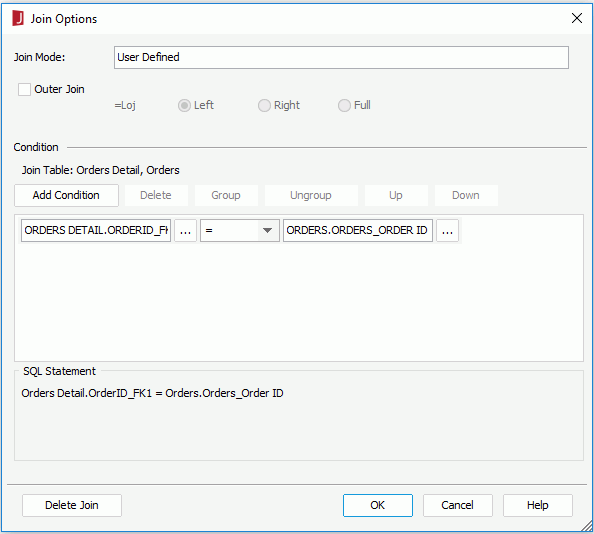
 in the join line. The Join Options dialog appears.

Click  beside the two text boxes to select a column in the two tables involved in the join, or a parameter or constant level formula in the current catalog data source and select the operator to compose the condition. You can also manually input the column, parameter or formula name in the text boxes (parameters and formulas should be input in the format @ParameterName or :ParameterName.). When a parameter is referenced in a join condition, the Ignore Predicate If Parameter Value Is Null setting of the parameter will be ignored.
To add another condition line, click the Add Condition button and define the condition as required. Then from the logic drop-down list, specify the relationship between the two condition lines. Repeat this to add more condition lines if necessary.
To make some conditions grouped, select them and click the Group button, then the selected conditions will be added in one group and work as one line of conditional expression. Conditions and groups together can be further grouped.
To take any condition or group in a group out, select it and click Ungroup.
To adjust the priority of the conditions, select it and click the Up or Down button.
To delete a condition line, select it and click the Delete button.
Click the Delete Join button if you want to delete the join.
Notes:
A Cartesian product is used when tables are included in the query together with no join specifications.
For example, Table A has three values: A, B and C. Table B has three values: 1, 2 and 3. Value A matches value 1, value B matches value 2, and so on. This is a specific match. However, a Cartesian product could have value A matching with 1, 2 and 3, and value B matching with 1, 2 and 3, and so on. Depending on the data values, Cartesian products can produce a large dataset as unnecessary information will be duplicated. For every record in Table A a record will be created for every record in Table B, thus, if Table A has 10 records and Table B has 10 records the result will be a dataset containing 100 rows. Not all Cartesian products are bad though so it is supported if the result is what you need to use.
You can specify whether to alert when this happens as follows: