 Previous Page Next Page
The example directory paths listed below are based on Unix. The instructions are applicable to both Unix and Windows installations; however, the format of the paths for Windows would use the Windows format, that is, C:\JReport\Server instead of /opt/JReport/Server.
It is assumed that:
/opt/resin directory./opt/JReport/Server/bin/distribute directory. To create the WAR file refer to the instructions in Building a WAR/EAR File to Include a Self-contained JReport Server. To deploy JReport Server to Resin 4.0.53:

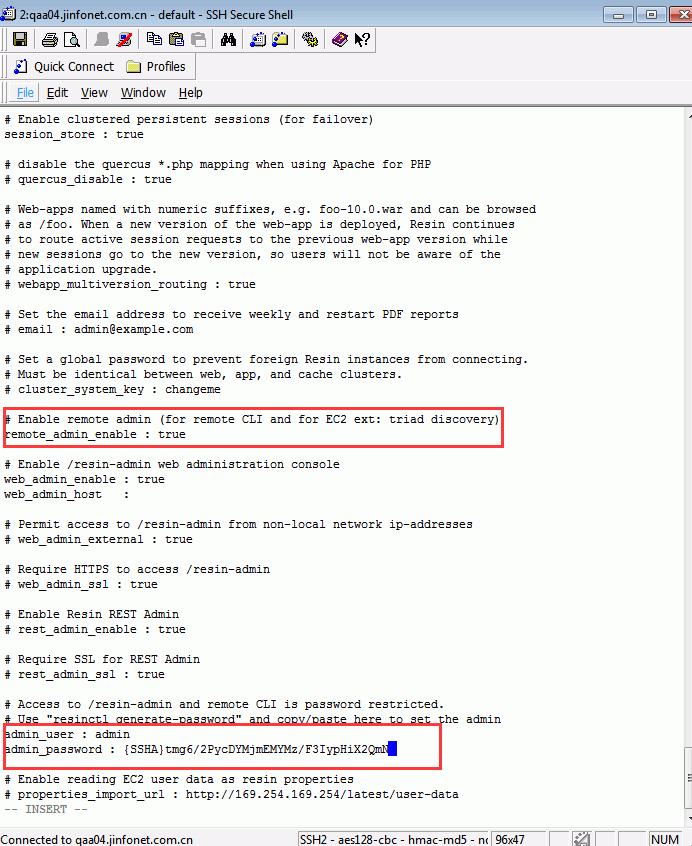
/opt/resin/conf. Set remote_admin_enable to true and add the generated password.

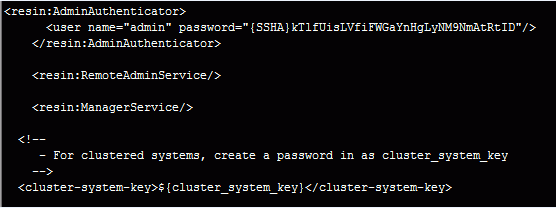
By default these commands are disabled. Enabling the command requires ManagerService be registered in resin.xml file. Since the default resin.xml already includes a <resin:AdminAuthenticator> with a <resin:import>, you can just reuse the admin configuration from the /resin-admin page.

/opt/resin/bin. http://localhost:8080/resin-admin/index.php. http://localhost:8080/jreport/jrserver
http://localhost:8080/jreport/admin/index.jsp
http://localhost:8080/jreport/jinfonet/index.jsp
If you run into problems when using JReport Server in Resin, send the log files of JReport Server to support@jinfonet.com. The following procedure illustrates how to generate the log files:
/opt/resin/bin by adding -Dlogall=true after the reporthome definition:
|
reporthome/logs.
The Resin log files may also help to identify the problem. The most useful one is /opt/Resin/server/default/log/server.log.