 Previous Page Next Page
Lesson 8: Creating a Report That Contains a Subreport
Here we need to create a report that contains a subreport to show the order detail information, the related customers and employees information.
This lesson shows a report combined with another report. When adding report A into report B, the report A is referred to as a subreport, while report B is considered as a primary report. We will first create a page report that contains two report tabs - one is about orders detail information, and the other is about a tabular report with two charts of different types.
In this lesson, we take the first report tab in the page report as the primary report, and the second one as the subreport. So that we can insert the second report tab to the first one to show the sales total by orders in different order ID groups.
Follow the tasks below to finish creating the report:
Task 1: Create a page report that contains two report tabs
Task 2: Insert a subreport to the report
Task 1: Create a page report that contains two report tabs
Before taking this task, make sure you have enabled the Insert field name label with field option in the Options dialog as described at the last step of Lesson 3. Otherwise, the name labels will not be inserted together with the fields when you add fields to the report.
- In JReport Designer click File > New > Page Report.
- In the Select Component for Page Report dialog, select Banded and click OK.
Be sure that JinfonetGourmetJava.cat is specified as the current catalog because this is the catalog we use in this track. For information about specifying this catalog, see Task 1, Step 2 and 3 of Lesson 1.
- In the Data screen of the Banded Wizard, expand the Imported SQLs node in Data Source 1 and select OrdersReport.

- Click Style to switch to the screen and select the Simple style for the report, then click Finish.
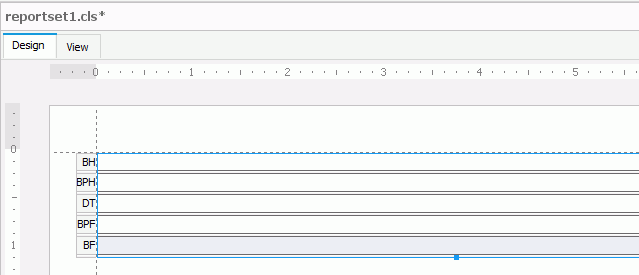
A report with a blank standard banded object is created as follows. The panels in the banded object are identified on the left by their abbreviations: a banded header panel (BH), a banded page header panel (BPH), a detail panel (DT), a banded page footer panel (BPF) and a banded footer panel (BF).
For users who wish to write their own SQL statement, JReport enables them to put the SQL statement into a file and then load them from this file. SQL files can work like queries in JReport.
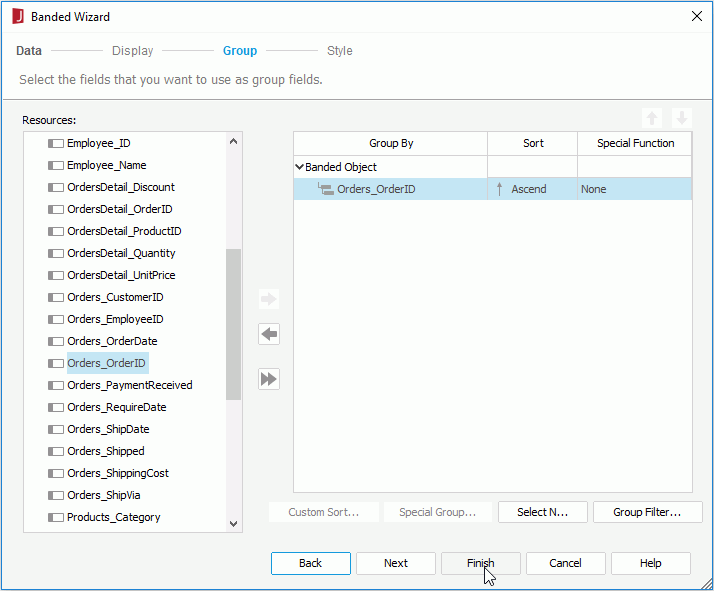
In this lesson, we need to group data by Order IDs, so we will add a group to the banded object.
- Right-click the banded object and then select Banded Wizard from the shortcut menu.
- In the Group screen of the Banded Wizard, add the DBField Orders_OrderID as the group by field by selecting it and clicking
 , then click Finish.
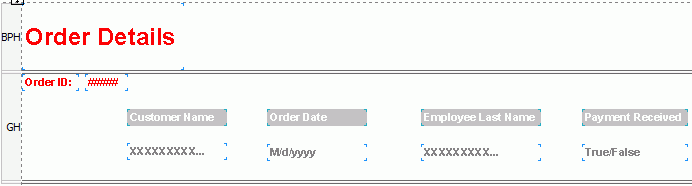
- Resize the GH panel of the banded object, drag the fields Customer_Name, Orders_OrderDate, Contact_LastName and Orders_PaymentReceived from the Data panel and drop them into it.
- Double-click and edit the Customer_Name, Orders_OrderDate, Contact_LastName and Orders_PaymentReceived name labels to Customer Name, Order Date, Employee Last Name and Payment Received one by one.
- Align the newly-added objects and resize them in the GH panel as follows:

- Resize the group by field in the GH panel, click Insert > Label to add a label ahead of it and edit its text to "Order ID:".

-
Select the Order Date DBField and set its Format property to M/d/yyyy in the Report Inspector.
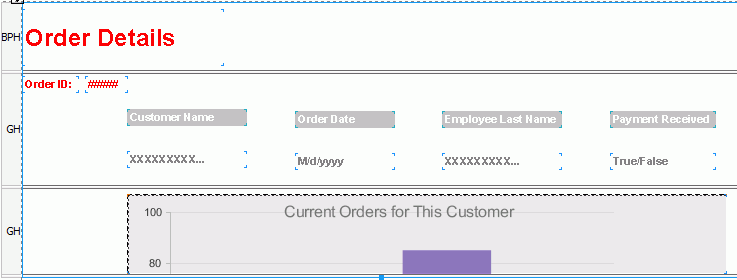
- Select the BPH panel, click Insert > Label to add a label in it and edit its text to Order Details. The label will then be shown in every page as the report title.
- Hide the BH, DT, GF, BPF and BF panels one by one by right-clicking the panel and selecting Hide from the shortcut menu.
- Format labels and DBFields in the report to improve their appearance. Here, we will not describe the formatting process in detail, you can refer to Task 3 of Lesson 1 for assistance.
Then the first report tab in the report is created to show the order detail information as follows in design mode:
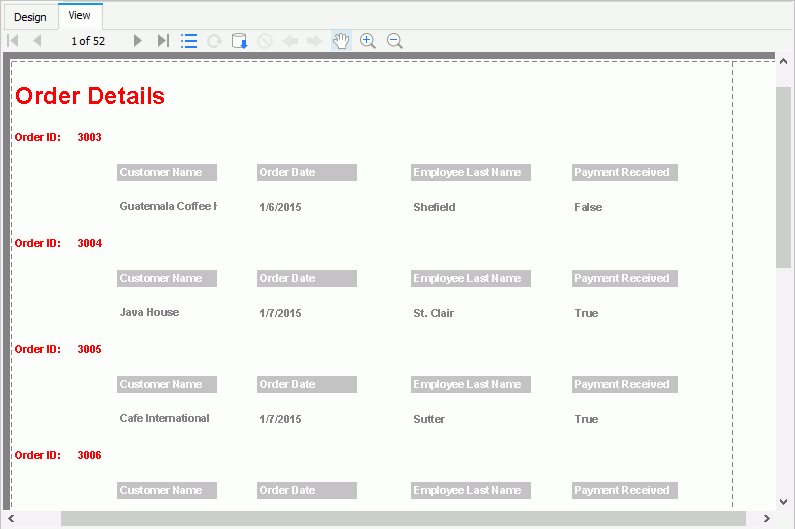
And the report looks as follows in view mode:
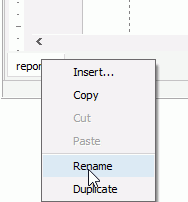
- On the report tab bar, right-click the report tab and select Rename to rename it to OrderDetailInformation.
Next, we will create the second report tab in the report.
- Click File > New > Page Report Tab.
- In the Select Component for Page Report Tab dialog, select Tabular from the layout box, then click OK.
- In the Tabular Wizard, keep the default settings and click Finish. A report tab with a blank 2*2 tabular is created.
- Merge the tabular cells into two rows by selecting two cells in a row while holding the Ctrl key on the keyboard, right-clicking on them and selecting Merge from the shortcut menu, then adjust them in order to place the bar chart and pie chart vertically in the report tab.
Next, we will insert the two charts into the tabular cells and have them share the same dataset as the OrdersDetailInformation report tab.
- Select the first tabular cell and click Insert > Chart on the menu bar.
- In the Data screen of the Create Chart wizard, click the More Options button, check the Existing Dataset radio button, then select the dataset OrdersReport. Click Next.
- In the Type screen, keep the default chart type Clustered Bar 2-D and click Next.
- In the Display screen, select the summary Sum_SQLProductSalesbyOrderID and click beside the Show Values box, Orders_OrderID is then added automatically to the Category box.
- Click Style the switch to the screen and select Basic from the Style list. Click Finish to create the chart.
- When a box attached to your mouse pointer, click the tabular cell to place the chart there.
-
Select the second tabular cell and insert a pie chart in it which uses the same dataset and displays the same data in the same style with the bar chart.
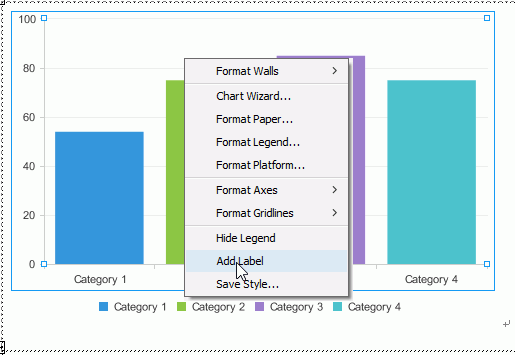
- Right-click the bar chart and select Add Label from the shortcut menu. A label is then added to the chart.
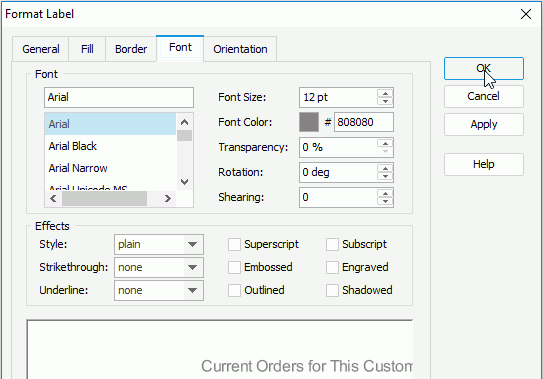
- Move the label to the top of the chart, then double-click it to display the Format Label dialog.
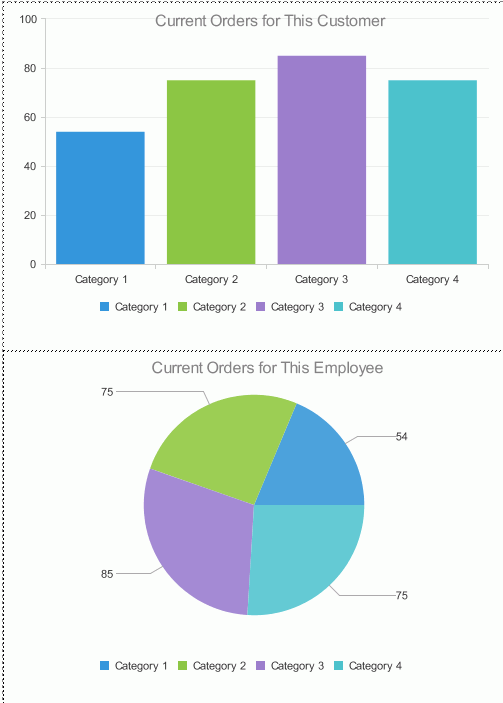
- In the General tab, change the label text to Current Orders for This Customer.
- Switch to the Font tab, change Font Size to 12pt, Font Color to 808080 and click OK.
- Resize the label to make sure the text is displayed completely.
- Add a label to the pie chart and format it using the same way and edit its text to Current Orders for This Employee.
- In the Report Inspector, select the Chart Object and Chart Object 1 nodes from the report structure tree by holding the Ctrl key on the keyboard, then change the Border Type properties to none.

- Select the Chart Legend Object and Chart Legend Object 1 nodes and change the Border Type property to None as well.
- Further format the two charts to improve their appearance if desired. For details about formatting chart, you can refer to Task 2 of Lesson 4.
Now the second report tab in the report is created to show the sales total by orders.
- On the report tab bar, right-click the report tab containing the charts to rename it to Sub_OrderDetails.
- Click File > Save to save the report as OrdersReport.cls.
Task 2: Insert a subreport to the report
After creating the report, we can insert the subreport to the primary report by specifying relationships between them. In this lesson, we can specify different relationships between the primary report (the first one) and the two chart components in the second report tab by setting up different links between them. Then JReport will build a subreport for every order with the conditions, so that it is convenient to see the corresponding customer and employee information of every order.
We want this subreport to be at the end of the existing reports, thus we need to add a second group header and add the subreport to the new header.
- Click OrderDetailInformation on the report tab bar to switch to the report tab.

- Right-click in the GH panel of the banded object and choose Insert Panel After from the shortcut menu.
- Select the newly-added panel and click Insert > Subreport.
- When a box attached to the mouse pointer, click the newly-added panel to place the subreport into it, and the Subreport dialog appears.
- Click the Browse button, select OrdersReport.cls and then click Open.
- Select Sub_OrderDetails from the Report Tab drop-down list.
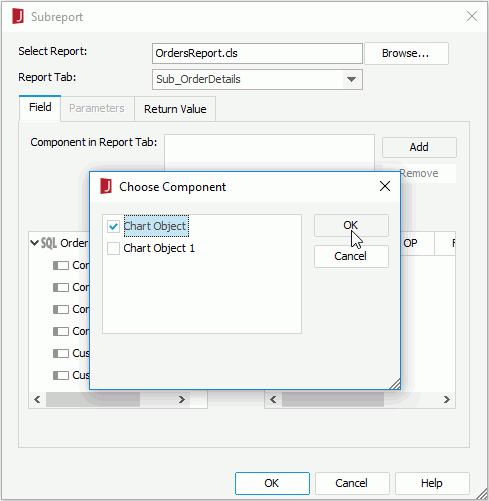
- Click the Add button beside the Component in Report Tab box in the Field tab, choose ChartObject in the Choose Component dialog, then click OK.
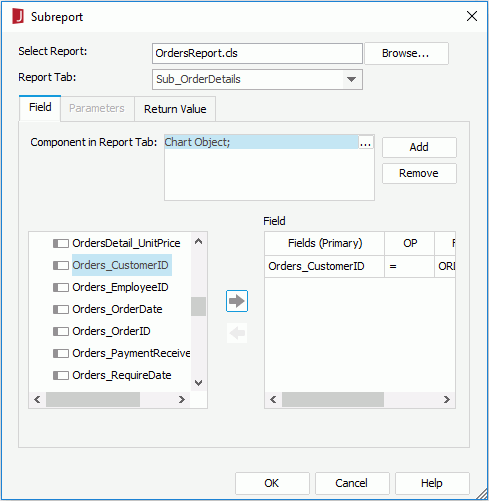
- Build the relationship between the primary report and the selected chart object on the Orders_CustomerID field by selecting the field and clicking .
- Click the Add button again, this time choose ChartObject1 in the Choose Component dialog, then click OK.
- Build the relationship between the primary report and the second chart object on the Orders_EmployeeID field.
- Click OK in the Subreport dialog and the report tab will be inserted in the OrderDetails report tab as follows:
Next, we will filter the dataset used by report tabs in the report so as to enhance the performance when running the report.
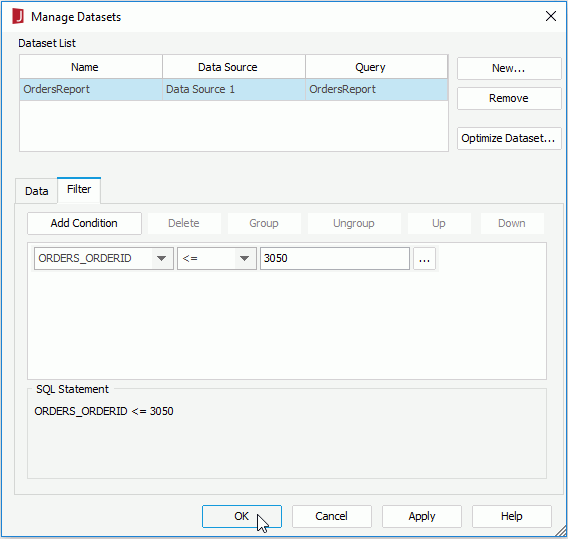
- Click Report > Manage Datasets to display the Manage Datasets dialog.
The Manage Datasets dialog lists all the dataset used in the current report. In our report, all the components share the same dataset, so here only one dataset is shown.
- Click the Filter tab, click the Add Condition button to add a filter line, select ORDERS_ORDERID from the field drop-down list, <= from the operator drop-down list, and enter 3050 in the value text field to specify the filter condition as ORDERS_ORDERID <= 3050, then click OK.
- Click File > Save to save the report.
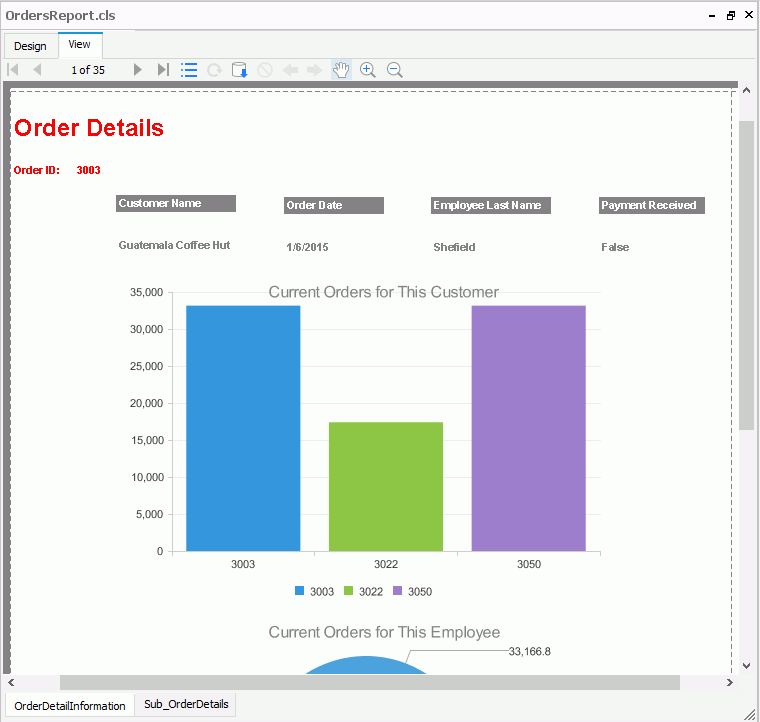
- Click the View tab, the report tab that contains a subreport is displayed as follows: the primary report shows the orders detail information grouped by order ID, and the subreport shows the orders information by different customers and different employees respectively in the two charts.
Note: If the report does not look correct, you can compare it to the final version of the report provided by JReport. To do so, you will need to save and close this catalog and then open the JinfonetGourmetJava.cat catalog file located at <install_root>\Demo\Reports\TutorialReports.
As you learned in this lesson, it is very convenient to build up a library of reports that act as components that you can add to various primary reports. Properly designed and used, subreports save a lot of time and effort in rapidly adapting your applications to changing user requirements and needs.
Previous Page Next Page